

GrapeCity社の.NET帳票コンポーネントであるActiveReportsを使用してデータバインドを行い、帳票を出力する方法を紹介します。
事前準備
ActiveReportをダウンロードする。
ActiveReports for .NET Standard(日本語版) をダウンロード (componentsource.co.jp)
本作業
①ActiveReportsクラスを作成する。
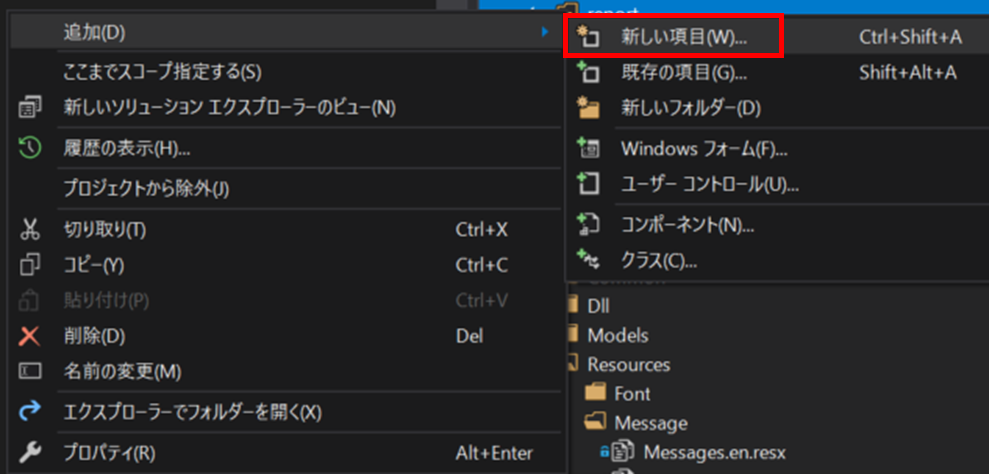
①-1.プロジェクト追加したいフォルダを右クリックし、「新しい項目」を選択
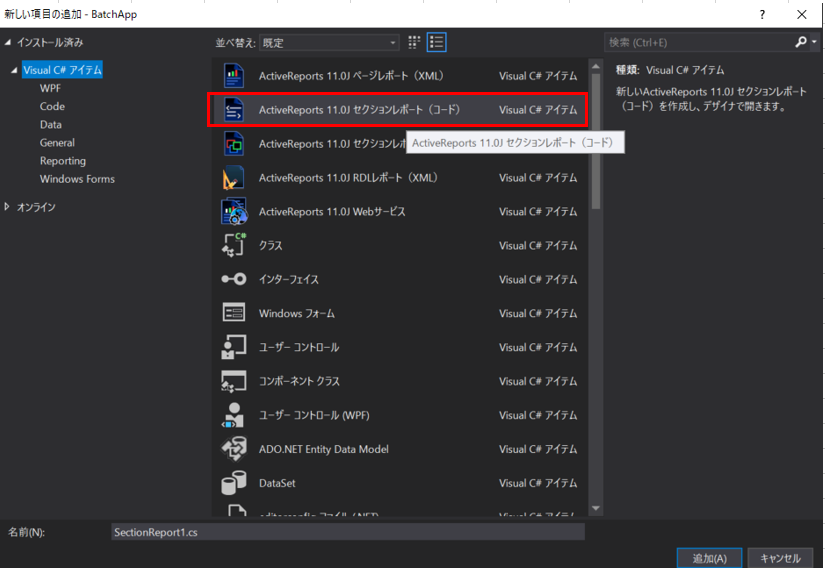
①-2.ActiveReports 11.0 セクションレポート(コード)を選択→該当の名前にして「追加」を押下。
①-3.①-2で作成したファイルをデザイナーで表示する。ツールボックスから「ActiveReports 11 セクション」→「TextBox」を選択し、ドラッグ&ドロップ。
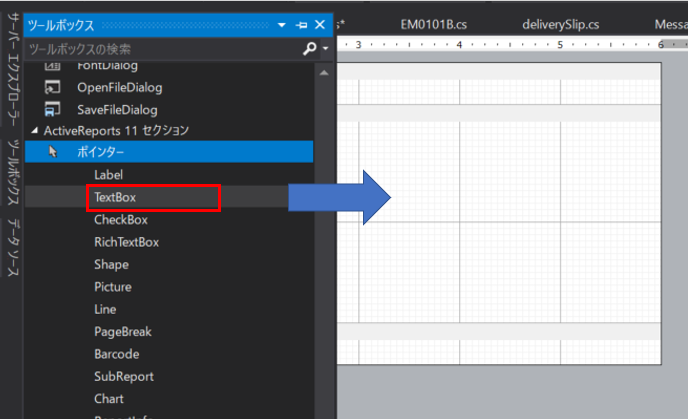
ドラッグ&ドロップ
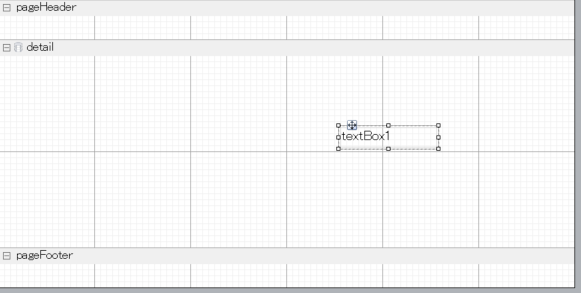
↓のようになります。
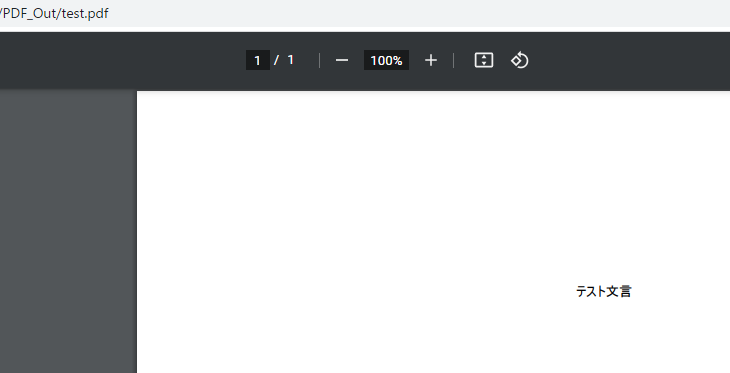
①-4.①-2で作成したファイルをコードで表示する。以下のように「SetData」メソッドを追加する。21行目のように値をセットする。今回は”テスト文言”をセットしています。
/// <summary>
/// SectionReport1 の概要の説明です。
/// </summary>
public partial class SectionReport1 : GrapeCity.ActiveReports.SectionReport
{
    public SectionReport1()
    {
        //
        // デザイナー サポートに必要なメソッドです。
        //
        InitializeComponent();
    }

    /// <summary>
    /// 動的データの設定を行う
    /// </summary>
    public bool SetData()
    {
        try
        {
            this.textBox1.Text = "テスト文言";
        }
        catch (Exception ex)
        {
            throw ex;
        }
        return true;
    }
}①-5①-2で.作成したクラス(SectionReport1)のインスタンスを作成してPDFファイルを出力する。
public override void BatchMain()
{
    try
    {
        var sr = new SectionReport1();
        // データセット
        sr.SetData();

        // 実装開始
        sr.Run(true);

        // PDF出力
        var pdfFileName = "test.pdf";
        var pdfExport1 = new GrapeCity.ActiveReports.Export.Pdf.Section.PdfExport();
        pdfExport1.Export(sr.Document, Path.Combine(@"..\PDF_Out\", pdfFileName));

        // 停止
        sr.Stop();
    }
    catch (Exception ex)
    {
        this.ExceptionHandler(ex);
    }
}
その他の備忘録はこちら👇

【美肌をかなえる はーたん流 美容の正解】を読破!
美肌をかなえる はーたん流 美容の正解 [ はーたん ] 楽天で購入 YouTuberでも有名なはーたんさんが…

【2022年版】フェイスマスク保水力ランキング ー ドラッグストアで買える ー 美ルルのスキンチェッカー使用
ドラッグストアで購入できるフェイスマスクからパックをした翌日の肌の水分値を調べて多い順にランキングさせて頂きま…

滋賀県大津市坂本の【比叡山延暦寺】へ先祖回向に行きました
なんだかいきなりどうしたというタイトルですよね笑 そもそも先祖回向とはなんぞや… ご回向えこうとは、お経やお念…